From Giant Dreams to Cozy Creations: The Tale of a Crochet Cow
- Hook Line and Crafter

- Aug 12, 2025
- 5 min read
I've been playing with this idea of making a giant cow for a while, and when I brought the yarn for my mandrakes, I instantly knew this would be the perfect yarn for my cow..... or so I thought.
I decided to reuse my old pattern from the incomplete hill and cow. First, I had to spend some time looking at the pattern and the highland cow head to determine the best way to add the cow spots. Now, according to Google search (good old Google), most cows have a typically black head with a white stripe down their nose. Now I know I could make the stripe separately, then sew it on. But I just think the lines are never great, and the toy ends up bulky. Plus, it's one extra safety check I can avoid. So, after lots of playing with needles to design the best white section, I added an edit to the pattern. Then, like normal, I start my project by making the accessories first. This just allows me to add them as I go if needed.

The accessories started fine. I had to edit the pattern to make the ears slightly longer, but all in all, I liked it. I made the snout great. Then, after 3 days of delaying the inevitable because I had colour-changing yarn, I began the head. It was pretty easy, I don't know why I thought it would be annoying. The colour changes were going smoothly (apart from cutting the arm all the time), and I was happy. Until I got about 10 rows in. This is where I currently am. Ten rows into my project, one ear and one muzzle done, and I'm debating frogging it all!! Why? You ask, well, because it's at this point that I realise I must have done the highland cow in a size 5 hook, as standard for my yummy yarn. Accept this yarn is a size 6 hook, so the difference is 1mm. So while he is slightly bigger, my dreams of a giant cow have now been shattered. I'm lost at what to do. Do I frog it all and go up to an 8mm hook, or simply make a 6mm and 8mm cow, or just keep the 6mm? Decisions, Decisions, what to choose....
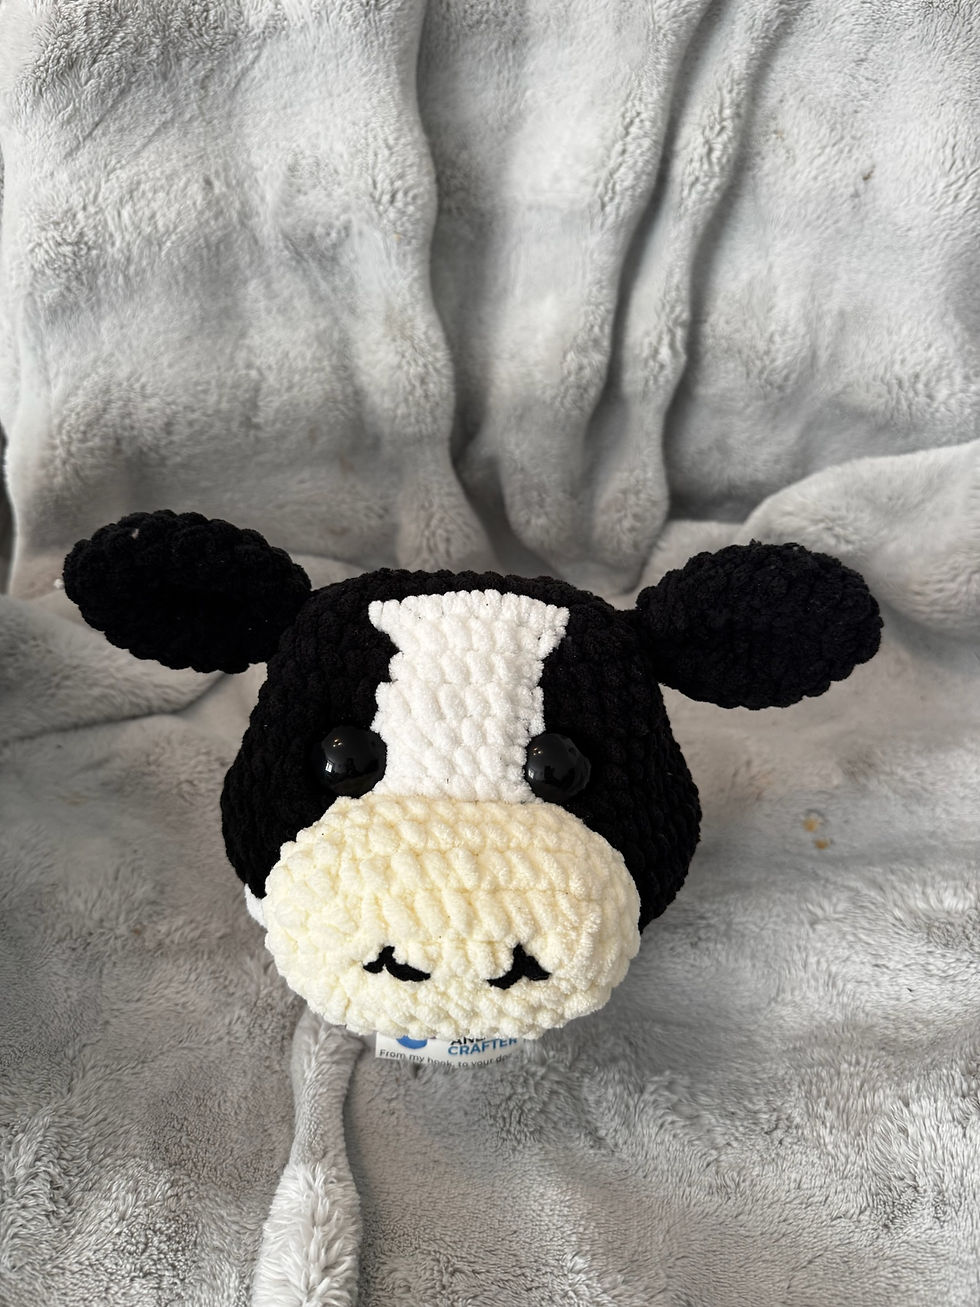
So 2 days later, I automatically pick it up and continue doing it... Guess we're sticking at 6mm. Finishing the head was fairly easy. I decided to add white to the back of the head so it looked like the face was a black spot. The only issue was where I had made the centre white piece as his nose, which meant the eyes didn't line up if I followed the pattern, which can be a future me problem. I had to make sure I ended in all white so it was easier to attach the head to the body later on. After finishing up the head, I could finally place the eyes, which look just fine where they are, even if they're further apart and lower than originally suggested. Now I just need to repeat the other ear and attach them... Problem, though, I forgot how I finished off the ear. I wasn't sure if I sewed it close or if I crocheted and then sewed it closed. I was 90% sure I sewed it close, which is what I repeated on this ear, but they still don't like identical to me. Sewing it on also proved tough. I googled cows and saw that their ears were typically at the side of their head rather than the top, but I couldn't figure out why it looked funky. I took them out
3 times before I finally realised I was placing them too close to the eyes, they needed to be more on the side of the head than at the front.
Now was the body. To start this, I needed to make the legs first. On the pattern, it just wants rounded hoofs, but I like the look of flat hooves. I also thought of making the hooves in cream to match the snout. Looking at the hooves now, I'm not sure it was an amazing idea, but I like that it matches. To make the hooves flat, I followed the instructions until the stitch count stayed the same. At this point, I then crochet BLO, which makes it flat, and I then carried on as normal. However, I didn't like how little the hooves were, so I added an extra round to make them thicker. I then cut the yarn and fastened off so it was hidden, which allows for a smoother colour change. Next is a BLO slip stitch row before continuing with the pattern, and boom, you have a seamless colour change. I added spots to some of the legs and boom, I now had a standing cow... kinda.

The body for this guy is quite interesting, but chaining between the legs, you are able to create a bottom and top piece that looks continuous. I enjoy this a lot as I work in YUYU. I create little boxes when I work, and by doing this practice, it allows that look to go through the whole body. I worked the bottom first, making sure to randomly add spots. After sewing it up, I realised that this pattern doesn't have udders, so I made a mental note to create some when I'm done. Next was the top half of the body. This was a bit more difficult because near the end of the body, you skip stitches and chain, which makes for a hole for the head. So I needed to be more careful about spot placement as I wanted to keep the neck white for an easier head placement. So after some great calculations, I worked out where the head would be attaching, and I avoided adding any spots... until I got confused. I got so into making sure there wasn't too much white that I didn't realise my mistake. Now I have a spot on the neck next to the head. Luckily, this is my test subject, but still very annoyed at myself for this error. Now, to close the back, it should be done in an oval to allow for a stitched-up back. This is because the original pattern is for a highland cow, which means the hair would cover up the stitching. As I knew, I couldn't hide the stitching the same way, I decided to just shut the back in a standard circular way, luckily enough, the stitch count allowed for this way.
Now everything done, all I had to do was stuff the piece and add the tails and udder... except I ran OUT OF STUFFING !!!! One of the requirements for
selling is that the stuffing used is always the same. Due to this, I use the same stuffing in all my projects, and I won't be able to get to that shop any time soon, so unfortunately, Mrs Moo Cow is a TBC !!


Comments